Maximizing Efficiency: Streamline Your Data Processing with Azure Event-Driven Ingestion
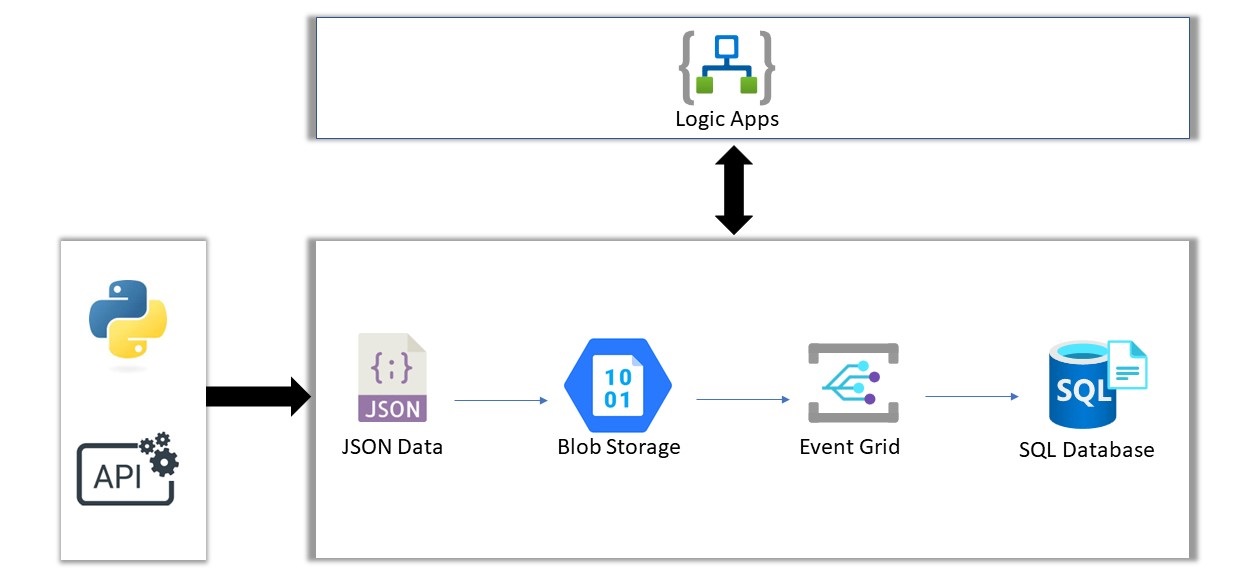
In this blog post, we will explore how to use Azure services such as Logic Apps, Event Grid, and Blob Storage to create an event-driven data ingestion system.
These files are then uploaded to an Azure Blob Storage container.
The Logic App reads the JSON files and ingests the data into an Azure SQL Database.
This allows the data to be available in a relational database for real-time querying and analysis.
We will cover how to configure Event Grid and Logic Apps, and how to ingest the data into a SQL Database.
By the end of this post, you will have a solid understanding of how to build an event-driven data ingestion system using Azure and be able to apply it to your own projects.
Let's begin:
The Fake-API Data:
You can use my Repo from Github from this:
https://github.com/PatrickDegner/FakeOrderDatabaseEntry
Creating a Logic App:
To create a Logic App, you can follow the steps in the Microsoft documentation at https://learn.microsoft.com/en-us/azure/logic-apps/logic-apps-overview
Creating a SQL Database:
To create a SQL Database, you can follow the Microsoft documentation at https://learn.microsoft.com/en-us/azure/azure-sql/database/single-database-create-quickstart
Creating a Storage Account:
To create a Storage Account, you can use the Microsoft documentation at https://learn.microsoft.com/en-us/azure/storage/common/storage-account-create
Once you have created your SQL Database, you will need to create a table to store the data that will be ingested.
In this example, we will create a table called "orders":
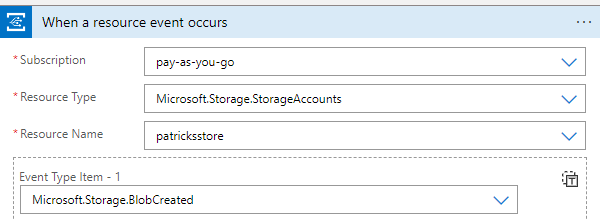
To start working on our Logic App, we first need to configure it to listen for changes in the Blob Storage.
This can be done by setting up an Event Grid trigger in our Logic App as seen on the Screenshot.
Once the Logic App is triggered by the Event Grid, the next step is to read the content of the blob file that was created.
To do this, you can add an "Get blob content using path" action to the Logic App workflow.
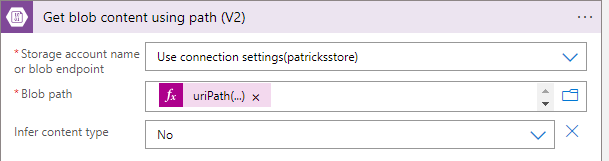
In Blob path we insert the following:
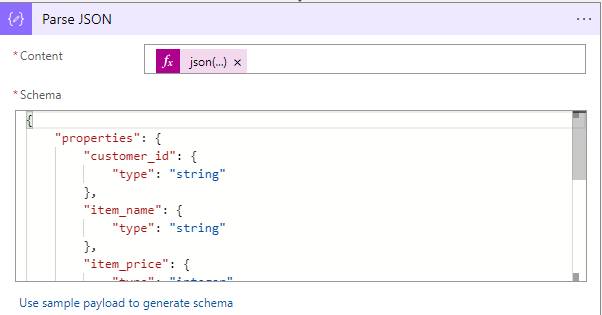
Now we can read the json file with the "Parse JSON" action. As Schema use:
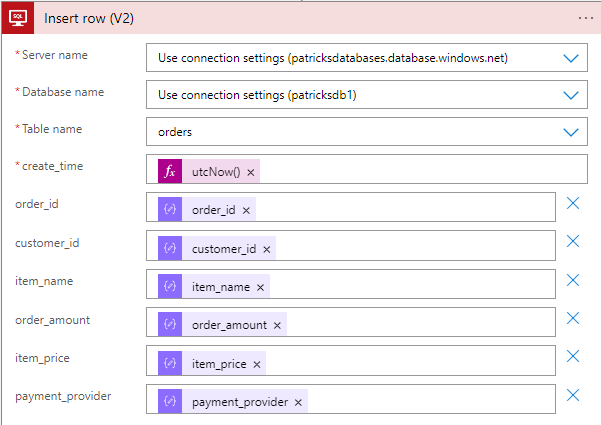
As next step, we will bring the data into the Database with the "Insert row" action.
Pick the fields from the json output as seen on the screenshot:
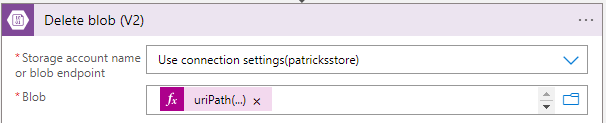
Once the content of the blob file has been read and processed, the final step is to delete the file from the Blob Storage.
This can be done by adding a "Delete Blob" action to the Logic App workflow.
The same uripath is used again:
This is a basic example of how to delete the file from Blob storage after the data has been processed and inserted into the SQL Database.
Depending on your specific use case, you may need to store the data somewhere else for future reference.
As soon as an order is created, the corresponding JSON file is uploaded to the Blob Storage container.
As soon as a new file is detected, the Logic App is triggered and proceeds to read the content of the blob file.
It then parses the JSON file and ingests the data into the SQL Database using the insert query.
Once the data is ingested, the file is deleted from the Blob Storage.
This process is repeated for every new file that is created, and you can see that the data is inserted into the SQL Database in real-time, with minimal delay.

Thank you for reading!
Greetings
Patrick


Comments
Post a Comment